Printmaking is one of those art forms that sounds intimidating—like you need a studio and expensive tools. You don’t. At its core, it’s just about creating an image and pressing it onto another surface. Think stamps, linocuts, or stencils. It’s shockingly accessible and offers a hands-on counterpoint to the digital world.
For beginners, printmaking delivers on three major fronts: it’s affordable, forgiving, and satisfying. You can start with a couple of basic tools and some scrap paper. There’s room for exploration and imperfect results still look great, which makes it addictive fast. If you’re already into sketching, it’s a natural upgrade—same creativity, just a new way to express it.
More than anything, printmaking gives you tangible results, fast. And that sense of progress? Big motivational boost.
Want to build momentum? Start your own Sketchbook Challenge.
Essential Supplies for Getting Started with Linocut
If you’re stepping into the world of linocut, the gear list is pretty lean—but each item pulls its weight. The essentials: brayers (for rolling ink), linoleum blocks (your carving surface), carving tools (V-gouges, U-gouges—start with a small set), water- or oil-based ink, and decent printing paper. You don’t need top-shelf brands to get results, but don’t go ultra-cheap either—middle grade is your friend when you’re learning.
On a tight budget? Swap professional linoleum for soft-cut blocks, which are easier on the hands and cheaper. Basic craft knives can stand in for carving tools in a pinch. As for ink, student-grade or even stamp pad ink can work while you’re testing the waters. For paper, try recycled sketchbook pages or newsprint for test prints before splurging on anything fancy.
Now the practical stuff. Workspace setup doesn’t need to be a dedicated studio. A flat table, a cutting mat, and some old newspapers will do the job. Clean-up depends on what type of ink you use—water-based inks clean with soap and water. Oil-based requires mineral spirits, so ventilation is key. Keep your tools sharp and your fingers clear: always carve away from your body and secure your block before cutting. Linocut isn’t complicated, but it demands respect.
Treat the space like a functional workshop. Keep things tight, safe, and organized. The goal is to make art—not a mess.
Foam tray printing is one of those simple, low-barrier ways to get into hands-on creativity—no special gear, no experience needed. It’s especially great for kids or anyone trying printmaking for the first time.
Start with your materials: a clean foam tray (like the kind you get from the grocery store), a dull pencil or ballpoint pen, and some tempera paint or block printing ink. That’s it.
Here’s how it breaks down:
- Design: Sketch your idea directly onto the foam using light pressure. Keep it bold and simple—the foam isn’t great for fine lines.
- Carve: Go over your lines a second time, pressing harder. This grooves the design into the surface.
- Ink: Use a roller or brush to spread an even, thin coat of ink across the surface.
- Press: Flip it onto paper, rub gently, and peel away.
You’ll end up with a clean, reversed print of your design. Do a few test runs to get the pressure right. And if you want to level it up, try repeating the same shape in patterns—grids, spirals, borders. A little repetition goes a long way for visual impact.
Collecting leaves, flowers, and other textured surfaces is where printmaking meets the outdoors. You don’t need much—just a walk, a few minutes, and an eye for shapes and detail. Look for contrast: bold veins in leaves, rigid bark, crinkled petals. These textures transfer beautifully.
There are two simple techniques to start with. Press printing involves applying ink to the object and pressing it into the paper—great for capturing outlines and hard details. Rub printing goes the opposite way: place the object under the paper and rub over it with graphite, charcoal or a crayon. It’s faster, more spontaneous, and great for sketch-like textures.
For both, paper matters. Go with medium-weight printmaking paper or textured watercolor stock—something with a bit of tooth. Inks? Don’t overthink it. Relief inks or water-based block printing ink work well. You want something thick enough to hold shape without bleeding.
This is more than craft. It’s a tactile study of organic form—a way to slow down and record texture, not through photography, but through pressure and touch. Whether you’re just getting into printmaking or need a creative reset, nature prints are a back-to-basics invitation worth taking.
Custom Shapes Using Foam Sheets and Wooden Blocks
Foam sheets and wooden blocks may not sound glamorous, but they’re the backbone of DIY stamping with real creative freedom. Here’s the gist: cut foam sheets into any shape you want—stars, initials, leaves, geometric patterns—and glue them onto small wooden blocks. These become your custom stamps. Simple, fast, and fully personal.
Layering makes the magic happen. Start light and build up. Use contrasting colors or tones within a single hue. Overlap shapes, slightly rotate them, leave room for white space. It’s not about perfection. It’s about rhythm and balance. Treat your background like a canvas, not just filler.
This technique shines when you need custom cards, paper tags, or standout wrapping paper. You don’t need fancy gear. Just some foam, wood, scissors, and a decent ink pad. It’s controlled chaos—with a personal touch.
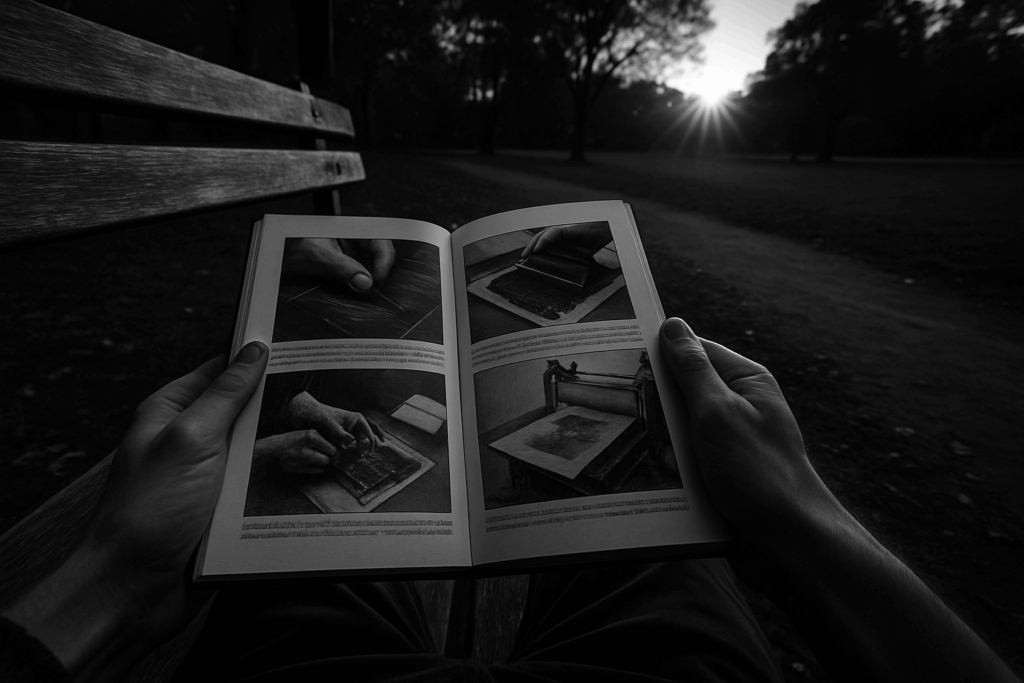
Linocut Basics: From Carving to Clean-Up
Getting started with linocut printing doesn’t require a fancy setup—just the right tools and a bit of patience. First, sketch your design (keep it simple at the beginning—bold shapes, clean lines). Transfer it to a linoleum block using transfer paper or by drawing directly on the surface.
When carving, always cut away from your hands and body. Use a bench hook if possible to keep your block stable. Start with larger areas and basic V-gouges. You don’t need to carve deep; shallow cuts give better detail and are easier to ink.
For beginners, designs like stylized flowers, animals, or type-based art work best. They give quick wins without getting you tangled in detail work.
When you’re ready to ink, roll a thin, even layer of ink onto a smooth surface with a brayer (ink roller). Then roll ink onto your carved block. You want coverage, not puddles. Press the block firmly onto paper—either by hand, with a baren, or using a printing press if you have one. Check that the entire image transferred evenly. If not, adjust your pressure or ink.
Clean up right after printing. Oil-based inks require solvent; water-based ones just need soap and warm water. Dry your block thoroughly before storing it flat in a cool, dry place—preferably wrapped or sealed away from heat and dust.
Linocutting is simple, meditative, and forgiving. You’ll miss a line here or jab too far there, but it’s part of the charm. Show up with focus, take your time, and soon you’ll have prints with real weight—on paper and in process.
Printmaking doesn’t have to stick to one color or one surface. Try layering multiple colors to build depth or texture—it adds complexity without overthinking the design. You can experiment with different inks, let the layers dry at different rates, and play with transparency levels.
Don’t limit yourself to paper, either. Try printing on fabric, cardboard, old book pages, or even packaging scraps. Found materials bring unexpected detail and personality. Part of the creativity is in the risk, so don’t be afraid to mess things up.
Keep a sketchbook nearby. Use it to track your process—what worked, what didn’t, how the prints evolved. Think of it as your studio log rather than an art piece.
And if you’re feeling stuck, plug into the community. Instagram hashtags, local printmaker meetups, Discord groups—there’s no shortage of people pushing boundaries and sharing tips. Printmaking might feel old-school, but in 2024, it’s very much alive.
You don’t need a studio, expensive gear, or years of training to start printmaking. A basic linocut kit, some ink, and an old spoon to press your prints—that’s enough to get the wheels turning. It’s accessible, tactile, and surprisingly easy to fall in love with.
What you lack in polish, you make up for in momentum. Progress happens fast if you keep showing up. One print teaches you things the last one didn’t. Keep at it and your hands will learn stuff your brain hasn’t caught up to yet.
And yes—some lines will smudge. Some ink will blot. That’s the point. The quirks are the signature. Every imperfection adds something that software can’t fake.
Don’t overthink the next idea. Let the process open the door. One small project sparks another, and before you know it, you’ve started your own visual language. Stay curious. Stay making.
 Johner Hazardics writes the kind of art movement highlights content that people actually send to each other. Not because it's flashy or controversial, but because it's the sort of thing where you read it and immediately think of three people who need to see it. Johner has a talent for identifying the questions that a lot of people have but haven't quite figured out how to articulate yet — and then answering them properly.
They covers a lot of ground: Art Movement Highlights, Essential Techniques and Tools, Art Exhibitions and Reviews, and plenty of adjacent territory that doesn't always get treated with the same seriousness. The consistency across all of it is a certain kind of respect for the reader. Johner doesn't assume people are stupid, and they doesn't assume they know everything either. They writes for someone who is genuinely trying to figure something out — because that's usually who's actually reading. That assumption shapes everything from how they structures an explanation to how much background they includes before getting to the point.
Beyond the practical stuff, there's something in Johner's writing that reflects a real investment in the subject — not performed enthusiasm, but the kind of sustained interest that produces insight over time. They has been paying attention to art movement highlights long enough that they notices things a more casual observer would miss. That depth shows up in the work in ways that are hard to fake.
Johner Hazardics writes the kind of art movement highlights content that people actually send to each other. Not because it's flashy or controversial, but because it's the sort of thing where you read it and immediately think of three people who need to see it. Johner has a talent for identifying the questions that a lot of people have but haven't quite figured out how to articulate yet — and then answering them properly.
They covers a lot of ground: Art Movement Highlights, Essential Techniques and Tools, Art Exhibitions and Reviews, and plenty of adjacent territory that doesn't always get treated with the same seriousness. The consistency across all of it is a certain kind of respect for the reader. Johner doesn't assume people are stupid, and they doesn't assume they know everything either. They writes for someone who is genuinely trying to figure something out — because that's usually who's actually reading. That assumption shapes everything from how they structures an explanation to how much background they includes before getting to the point.
Beyond the practical stuff, there's something in Johner's writing that reflects a real investment in the subject — not performed enthusiasm, but the kind of sustained interest that produces insight over time. They has been paying attention to art movement highlights long enough that they notices things a more casual observer would miss. That depth shows up in the work in ways that are hard to fake.